Author: Predrag

  • How to Send an Automated Alert When a Member Pays Offline With a Check

    Summary

    This document explains how to implement an automated email alert system that notifies site administrators when a member pays offline using the MemberPress offline payment gateway. The solution allows administrators to receive immediate notifications when check payments are received, eliminating the need to manually monitor the Transactions page.

    The automated alert includes comprehensive transaction details such as member type, payment amount, product purchased, and transaction number. This system distinguishes between new members making their first purchase and existing members making additional payments. The solution addresses edge cases including duplicate email prevention, manual transaction completion workflows, and proper handling of pending versus completed transaction statuses.

    Troubleshooting

    Setting Up Automated Email Alerts for Offline Check Payments

    MemberPress does not include a built-in notification system for offline check payments. When members use the offline payment gateway to pay by check, administrators must manually monitor the Dashboard > MemberPress > Transactions page to identify new payments. This manual monitoring process creates delays in processing check payments and activating member access.

    Solution:

    Add the following code snippet to automatically send email alerts when offline check payments are received. The code can be implemented using either the WPCode plugin or your child theme’s functions.php file.

    /**
    * MemberPress Offline Check Payment Alert
    *
    * Sends an automated email alert when a new or existing member
    * pays offline with a check (offline payment).
    */

    // Hook into transaction store - fires when transaction is saved
    add_action('mepr_txn_store', 'mepr_send_offline_check_alert', 10, 1);

    function mepr_send_offline_check_alert($txn) {
    // Basic validation
    if (!$txn || !($txn instanceof MeprTransaction)) {
    return;
    }

    // Only process offline payments
    $mepr_options = MeprOptions::fetch();
    $gateway = $mepr_options->payment_method($txn->gateway);

    if (!$gateway || !isset($gateway->settings->gateway) || $gateway->settings->gateway !== 'MeprArtificialGateway') {
    return;
    }

    // Check if manually_complete is enabled
    $manually_complete = isset($gateway->settings->manually_complete) &&
    ($gateway->settings->manually_complete === 'on' || $gateway->settings->manually_complete === true);

    // If manually_complete is disabled, only send when complete
    // If manually_complete is enabled, only send when pending
    if (!$manually_complete && $txn->status !== 'complete') {
    return;
    }
    if ($manually_complete && $txn->status !== 'pending') {
    return;
    }

    // Prevent duplicate emails
    $sent_key = 'mepr_offline_alert_' . $txn->id;
    if (get_transient($sent_key)) {
    return;
    }
    set_transient($sent_key, true, DAY_IN_SECONDS);

    // Get details
    $user = $txn->user();
    $product = $txn->product();
    $user_transactions = MeprTransaction::get_all_by_user_id($user->ID);
    $is_new_member = count($user_transactions) <= 1;

    // Build email
    $admin_email = get_option('admin_email');
    $member_type = $is_new_member ? 'New Member' : 'Existing Member';
    $status_label = ($txn->status === 'complete') ? 'Completed' : 'Pending';

    $subject = sprintf('[%s] Offline Check Payment Received (%s) - %s',
    get_bloginfo('name'), $status_label, $member_type);

    $message = sprintf(
    "An offline check payment has been received.\n\n" .
    "Status: %s\n" .
    "Member Type: %s\n" .
    "Member Name: %s\n" .
    "Member Email: %s\n" .
    "Product/Membership: %s\n" .
    "Transaction Number: %s\n" .
    "Amount: %s\n" .
    "Date: %s\n\n" .
    "Please process this check payment manually.\n\n" .
    "View Transaction: %s",
    ucfirst($txn->status),
    $member_type,
    $user->full_name(),
    $user->user_email,
    $product->post_title,
    $txn->trans_num,
    MeprAppHelper::format_currency($txn->total),
    date_i18n(get_option('date_format') . ' ' . get_option('time_format'), strtotime($txn->created_at)),
    admin_url('admin.php?page=memberpress-trans&action=edit&id=' . $txn->id)
    );

    // Send email
    wp_mail($admin_email, $subject, $message);
    }

    Implementation Methods

    Method 1: Using WPCode Plugin (Recommended)

    The WPCode plugin provides a safer method for adding custom code without directly editing theme files. WPCode allows code snippets to persist across theme updates and can be easily enabled or disabled.

    1. Navigate to Dashboard > Code Snippets > + Add Snippet.
    2. Click Add Your Custom Code (New Snippet).
    3. Set the Code Type to PHP Snippet.
    4. Paste the code from the solution above into the Code Preview area.
    5. Set the Insertion method to Auto Insert.
    6. Set the Location to Run Everywhere.
    7. Toggle the snippet to Active.
    8. Click Save Snippet.

    Method 2: Using Child Theme functions.php

    Alternatively, the code can be added directly to your child theme’s functions.php file. This method requires creating a child theme if one does not already exist.

    1. Connect to your site via FTP or use the WordPress file editor.
    2. Navigate to /wp-content/themes/[[YOUR-CHILD-THEME]]/functions.php.
    3. Open the functions.php file for editing.
    4. Paste the code at the end of the file.
    5. Save the changes.

    Important: Always use a child theme when modifying theme files. Editing the parent theme’s functions.php file directly will result in loss of customizations when the theme is updated.

    Understanding How the Solution Works

    The code snippet implements automated email notifications by hooking into the mepr_txn_store action. This action fires whenever a MemberPress transaction is saved or updated. The solution includes several validation checks and conditional logic to ensure emails are sent only for offline check payments and prevent duplicate notifications.

    Key Components of the Solution

    • Gateway Validation: The code verifies the transaction uses the offline payment gateway (MeprArtificialGateway) before proceeding. This ensures emails are sent only for offline check payments and not for Stripe, PayPal, or other online payment methods;
    • Transaction Status Handling: The solution adapts to your offline gateway configuration. If the Admin Must Manually Complete Transactions setting is enabled, emails are sent when transactions are marked as Pending. If this setting is disabled, emails are sent only when transactions are automatically marked as Complete;
    • Duplicate Prevention: The code uses WordPress transients to prevent duplicate emails. A unique transient is created for each transaction and expires after 24 hours, ensuring each transaction generates only one notification;
    • Member Type Detection: The system determines if the paying member is new or existing by counting their total transactions. A member with only one transaction is considered new, while members with multiple transactions are classified as existing;
    • Comprehensive Email Details: The notification email includes transaction status, member type, member name and email, product purchased, transaction number, payment amount, submission date, and a direct link to edit the transaction in the WordPress admin.

    Common Configuration Scenarios

    1) Emails Not Sending for Pending Transactions

    If the Admin Must Manually Complete Transactions option is enabled in the offline gateway settings but no email alerts are being received when members register, the issue may be related to how the gateway setting is being detected.

    How to Test/Fix:

    1. Navigate to Dashboard > MemberPress > Settings > Payments tab.
    2. Click on your offline payment gateway to edit the settings.
    3. Verify that Admin Must Manually Complete Transactions is checked.
    4. Click Update Options to save changes.
    5. Test by creating a new offline payment transaction through the registration page.
    6. Check your admin email inbox for the notification.
    7. If no email arrives, verify the admin email address is correct by navigating to Dashboard > Settings > General and checking the Administration Email Address field.

    2) Receiving Duplicate Email Notifications

    Multiple email notifications for the same transaction can occur if the transaction is being updated multiple times in rapid succession or if caching is interfering with the transient check.

    How to Test/Fix:

    1. Verify that the duplicate prevention code is present in your implementation.
    2. Check if object caching is enabled on your site. Navigate to Dashboard > Plugins and look for caching plugins like Redis Object Cache, Memcached, or similar.
    3. If using object caching, modify the transient code to use the database instead. Replace set_transient($sent_key, true, DAY_IN_SECONDS); with update_option($sent_key, true); and replace if (get_transient($sent_key)) { with if (get_option($sent_key)) {.
    4. Add a cleanup function to delete old option entries. This prevents the database from accumulating unnecessary records.

    3) Email Notifications Sent for Online Payments

    If email notifications are being sent for Stripe, PayPal, or other online payment methods in addition to offline check payments, the gateway validation check is not functioning correctly.

    How to Test/Fix:

    1. Verify that the gateway validation code is present in your implementation.
    2. Check for syntax errors in the code that might be causing the gateway check to be skipped.
    3. Add debugging to verify the gateway type. Temporarily add error_log('Gateway: ' . $gateway->settings->gateway); after the $gateway = $mepr_options->payment_method($txn->gateway); line.
    4. Check the error log at /wp-content/debug.log to see which gateway types are being processed.
    5. Ensure the gateway check $gateway->settings->gateway !== 'MeprArtificialGateway' is present and correctly returning early for non-offline gateways.

    4) Need to Send Emails to Multiple Recipients

    The default implementation sends notifications only to the WordPress admin email address. Some sites require notifications to be sent to multiple team members or departments.

    Solution:

    Modify the email recipient line to include multiple addresses. Replace $admin_email = get_option('admin_email'); with an array of email addresses:

    $admin_email = array(
        'admin@yourdomain.com',
        'billing@yourdomain.com',
        'support@yourdomain.com'
    );

    The wp_mail() function accepts either a single email address or an array of addresses. All recipients will receive the same notification email.

    Testing the Email Notification System

    After implementing the code snippet, thorough testing ensures the notification system functions correctly in your specific configuration.

    Testing Procedure

    1. Log out of WordPress and navigate to a membership registration page that uses the offline payment gateway.
    2. Complete the registration form using test data. Use a unique email address that you can access to verify the registration process.
    3. Select the offline payment option during checkout.
    4. Submit the registration form.
    5. Check the admin email inbox for the offline payment notification. The email should arrive within 1-2 minutes.
    6. Verify that the email contains correct transaction details including member name, email, product, amount, and transaction number.
    7. Navigate to Dashboard > MemberPress > Transactions and verify the transaction appears with the correct status.
    8. If using Admin Must Manually Complete Transactions, verify the transaction status is Pending and the email was received.
    9. Test with an existing member to verify the “Existing Member” label appears in the notification email instead of “New Member”.

    Note: If email notifications are not arriving, check your site’s email configuration. Many WordPress sites require an SMTP plugin like WP Mail SMTP to ensure reliable email delivery. Navigate to Dashboard > Tools > Site Health and check for email-related warnings.

    Advanced Customizations

    Customizing the Email Subject Line

    The email subject line can be modified to include additional information or match your organization’s notification standards. Locate this line in the code:

    $subject = sprintf('[%s] Offline Check Payment Received (%s) - %s', 
        get_bloginfo('name'), $status_label, $member_type);

    Modify the text within the sprintf() function to customize the subject line format. For example, to include the transaction amount in the subject:

    $subject = sprintf('[%s] Offline Payment: %s - %s (%s)', 
        get_bloginfo('name'), 
        MeprAppHelper::format_currency($txn->total),
        $member_type,
        $status_label);

    Customizing the Email Message Body

    The email message body can be expanded to include additional transaction or member details. The message is constructed in the $message variable. Add new lines using the format "Label: %s\n" within the sprintf() function, then add the corresponding variable at the end.

    For example, to include the member’s user ID and the membership expiration date:

    $message = sprintf(
        "An offline check payment has been received.\n\n" .
        "Status: %s\n" .
        "Member Type: %s\n" .
        "Member ID: %s\n" .
        "Member Name: %s\n" .
        "Member Email: %s\n" .
        "Product/Membership: %s\n" .
        "Transaction Number: %s\n" .
        "Amount: %s\n" .
        "Date: %s\n" .
        "Expires: %s\n\n" .
        "Please process this check payment manually.\n\n" .
        "View Transaction: %s",
        ucfirst($txn->status),
        $member_type,
        $user->ID,
        $user->full_name(),
        $user->user_email,
        $product->post_title,
        $txn->trans_num,
        MeprAppHelper::format_currency($txn->total),
        date_i18n(get_option('date_format') . ' ' . get_option('time_format'), strtotime($txn->created_at)),
        date_i18n(get_option('date_format'), strtotime($txn->expires_at)),
        admin_url('admin.php?page=memberpress-trans&action=edit&id=' . $txn->id)
    );

    Public Facing Documentation / Additional References

    Public Facing Documentation

    Developer Documentation

  • Custom Shortcode to Display Content Only During MemberPress Subscription Trial Period

    Summary

    MemberPress does not provide a built-in shortcode or native conditional that determines whether a subscription is currently in its trial period. This document describes a custom code workaround that allows site owners to conditionally display content only while a specific subscription remains within its trial window.

    This solution is commonly used for trial-specific messaging during subscription cancellation flows, upgrade reminders before the first billing occurs, or trial-only instructions and notices. The custom shortcode retrieves subscription data from URL parameters or cookies, validates the subscription status, and renders enclosed content only when all trial period conditions are met.

    Troubleshooting

    Understanding the Limitation

    MemberPress provides conditional rules and shortcodes for many scenarios, but does not include a native way to detect whether a subscription is currently in trial.

    Without custom logic, it is not possible to show different content to users who are in trial versus users who have completed their trial and entered regular billing cycles. This limitation affects several common use cases where trial-specific messaging is required.

    Common Use Cases for Trial-Only Content

    1) Displaying Trial Cancellation Warnings

    Site owners want to show specific cancellation warnings or retention messaging only to users who are canceling during their trial period, before they have been charged for the first regular billing cycle.

    How to Test/Fix: Implement the custom shortcode solution described in this document. The shortcode can wrap trial-specific cancellation warnings, allowing different messaging for trial cancellations versus regular subscription cancellations.

    2) Trial-Specific Upgrade Reminders

    Membership sites with multiple tiers want to encourage users to upgrade from a trial membership to a premium membership before the first billing occurs, offering trial-only incentives or messaging.

    How to Test/Fix: Use the custom shortcode to wrap upgrade offers, coupon codes, or promotional messaging that should only appear while the subscription is in trial status. Once the trial period ends and regular billing begins, this content will automatically be hidden.

    3) Trial Period Instructions and Onboarding

    During trial periods, sites may want to display onboarding instructions, feature tutorials, or trial-specific guidance that becomes unnecessary once users convert to paying members.

    How to Test/Fix: Implement the shortcode to conditionally display onboarding content, trial feature highlights, or time-sensitive trial information that should disappear after the trial period ends.

    Custom Shortcode Solution

    The custom shortcode works by retrieving subscription data from either the cancel_sub URL parameter or the mepr_cancel_override_sub cookie. It then loads the MeprSubscription object, validates that the subscription exists, has a trial period configured, and is currently within the trial window. Content wrapped in the shortcode tags is displayed only when all these conditions are met.

    Implementation Methods

    There are two recommended methods for implementing the custom shortcode on a WordPress site. Choose the method that best matches the technical comfort level of the site administrator.

    Method 1: Using WPCode Plugin (Recommended)

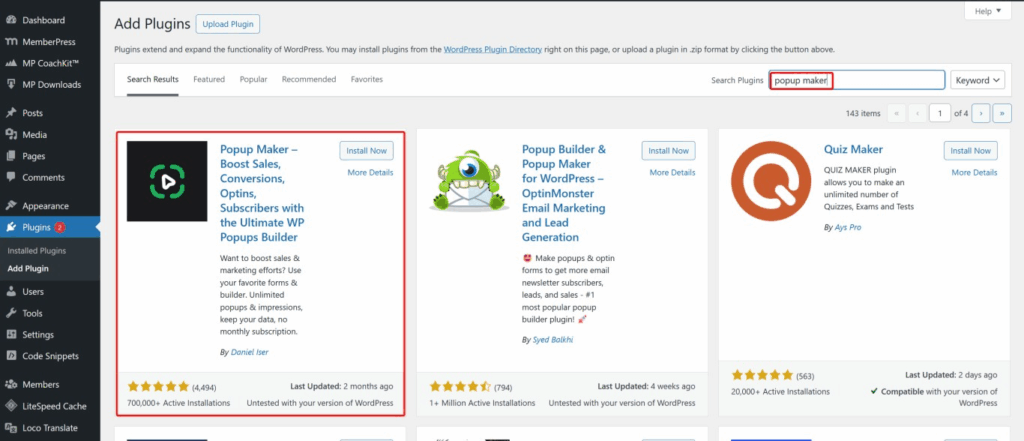
    1. Navigate to Dashboard > Plugins > Add New.
    2. Search for “WPCode”.
    3. Click Install Now and then Activate.
    4. Navigate to Dashboard > Code Snippets > Add Snippet.
    5. Click Add Your Custom Code (New Snippet).
    6. Enter a descriptive name such as “MemberPress Trial Period Shortcode”.
    7. Set the Code Type to PHP Snippet.
    8. Paste the custom code provided below into the code editor.
    9. Set Location to Run Everywhere.
    10. Toggle the snippet to Active.
    11. Click Save Snippet.

    Method 2: Using Child Theme Functions.php

    [message type=”alert” show_icon=”true”]Important: Always use a child theme when modifying functions.php to prevent losing changes when the parent theme is updated. Never edit the parent theme’s functions.php file directly. If a child theme is not currently installed, create one before proceeding.[/message]

    1. Connect to the site via FTP, SFTP, or use the hosting control panel’s file manager.
    2. Navigate to /wp-content/themes/[[YOUR-CHILD-THEME-NAME]]/.
    3. Open the functions.php file for editing.
    4. Scroll to the bottom of the file.
    5. Paste the custom code provided below.
    6. Save the file and upload it to the server if using FTP.

    Custom Shortcode Code

    /**
     * Custom shortcode to display content only when a MemberPress subscription is in trial period
     * 
     * Usage: [mepr_trial_only]Your content here[/mepr_trial_only]
     * 
     * This shortcode retrieves subscription ID from the cancel_sub URL parameter or 
     * mepr_cancel_override_sub cookie, then checks if the subscription is currently 
     * in its trial period. Content is displayed only during active trial periods.
     */
    function mepr_display_content_during_trial( $atts, $content = null ) {
      // Return empty string if no content is provided
      if ( empty( $content ) ) {
        return '';
      }
    
      // Attempt to retrieve subscription ID from URL parameter or cookie
      $subscription_id = isset( $_GET['cancel_sub'] ) ? intval( $_GET['cancel_sub'] ) : 0;
      
      if ( empty( $subscription_id ) && isset( $_COOKIE['mepr_cancel_override_sub'] ) ) {
        $subscription_id = intval( $_COOKIE['mepr_cancel_override_sub'] );
      }
    
      // Exit early if no subscription ID is found
      if ( empty( $subscription_id ) ) {
        return '';
      }
    
      // Load MemberPress subscription object
      // Requires MemberPress to be active and MeprSubscription class to exist
      if ( ! class_exists( 'MeprSubscription' ) ) {
        return '';
      }
    
      $subscription = new MeprSubscription( $subscription_id );
    
      // Verify the subscription exists and has required data
      if ( empty( $subscription->id ) || $subscription->id != $subscription_id ) {
        return '';
      }
    
      // Check if subscription has a trial period configured
      // The 'trial' property is a boolean indicating trial period exists
      if ( empty( $subscription->trial ) ) {
        return '';
      }
    
      // Check if subscription is currently within trial period
      // This validates that current time is before trial ends
      if ( ! $subscription->is_trial() ) {
        return '';
      }
    
      // All conditions met - subscription exists, has trial, and is in trial period
      // Return the content wrapped in shortcode tags
      return do_shortcode( $content );
    }
    add_shortcode( 'mepr_trial_only', 'mepr_display_content_during_trial' );

    Shortcode Usage Examples

    After implementing the code using either method above, the shortcode can be used in any page, post, or template where trial-specific content needs to display.

    Basic Usage:

    [mepr_trial_only]
    This message will only appear during the trial period.
    [/mepr_trial_only]

    Cancellation Warning Example:

    [mepr_trial_only]
    <div style="background: #fff3cd; padding: 20px; border-left: 4px solid #ffc107;">
      <h3>Canceling During Trial?</h3>
      <p>You are still in your trial period. If you cancel now, you will not be charged. Your access will end immediately.</p>
      <p>Consider extending your trial or upgrading to our premium plan to keep full access.</p>
    </div>
    [/mepr_trial_only]

    Upgrade Promotion Example:

    [mepr_trial_only]
    <div class="trial-upgrade-box">
      <h4>🎉 Limited Trial Offer!</h4>
      <p>Upgrade to Premium before your trial ends and get 20% off your first 3 months.</p>
      <p>Use coupon code: <strong>TRIAL20</strong></p>
      <a href="/premium-upgrade/">Upgrade Now</a>
    </div>
    [/mepr_trial_only]

    Testing the Shortcode Implementation

    1. Create a test membership with a trial period configured under Dashboard > MemberPress > Memberships.
    2. Set Billing Type to Recurring.
    3. Enable Trial Period and set trial duration to 7 days with a trial amount of $0.00.
    4. Create a test user account and register for the trial membership.
    5. Add the [mepr_trial_only] shortcode with test content to the membership cancellation page or account page.
    6. Navigate to Dashboard > MemberPress > Subscriptions and locate the test subscription.
    7. Click the subscription to view details and verify the trial period is active.
    8. Visit the page containing the shortcode while logged in as the test user.
    9. Verify that the trial-specific content displays correctly.
    10. To test the opposite scenario, either wait for the trial to expire or manually edit the subscription to remove trial status.
    11. Refresh the page and confirm that the trial-specific content no longer displays.

    [message type=”info” show_icon=”true”]Note: This shortcode only works when a subscription ID can be retrieved from the cancel_sub URL parameter or the mepr_cancel_override_sub cookie. This is automatically handled on subscription cancellation pages and account management pages where MemberPress sets these values.[/message]

    Troubleshooting Common Issues

    1) Shortcode Content Not Displaying During Trial

    The most common cause is that the subscription ID is not being properly retrieved from the URL or cookie. This typically occurs when testing the shortcode on pages where MemberPress does not automatically set the subscription context.

    How to Test/Fix:

    1. Verify the page URL includes the cancel_sub parameter with a valid subscription ID.
    2. Check browser developer tools (F12) under Application > Cookies to confirm the mepr_cancel_override_sub cookie exists.
    3. If testing outside of cancellation flows, manually append ?cancel_sub=[[SUBSCRIPTION_ID]] to the URL for testing.
    4. Verify the subscription actually has a trial period configured by checking Dashboard > MemberPress > Subscriptions.
    5. Confirm the subscription status shows as “Active” with trial dates visible.

    2) Shortcode Displays Content After Trial Ends

    This indicates that the trial period validation is not working correctly, or that the subscription trial dates have not been properly updated after the trial period expired.

    How to Test/Fix:

    1. Navigate to Dashboard > MemberPress > Subscriptions.
    2. Locate the affected subscription and verify the trial end date has passed.
    3. Check if the subscription status still shows as “In Trial” when it should have converted to regular billing.
    4. If the trial date is correct but content still shows, clear all site caching including page cache, object cache, and CDN cache.
    5. Test again in a private/incognito browser window to eliminate browser caching issues.
    6. If the issue persists, the subscription may have been manually edited with incorrect trial dates. Verify trial_days and created_at subscription metadata.

    3) Code Causes White Screen or PHP Error

    PHP errors typically indicate a conflict with the custom code implementation, incompatible PHP version, or MemberPress is not properly loaded when the code executes.

    How to Test/Fix:

    1. Enable WordPress debug mode by adding define(‘WP_DEBUG’, true); to the wp-config.php file.
    2. Check the /wp-content/debug.log file for specific error messages.
    3. Verify MemberPress is activated and up to date under Dashboard > Plugins.
    4. If using functions.php method, ensure the code was pasted at the end of the file with proper PHP opening tag.
    5. If using WPCode plugin, verify the code type is set to PHP Snippet and not HTML Snippet or Universal Snippet.
    6. Test for plugin conflicts by temporarily deactivating other plugins and testing if the shortcode works.
    7. As a last resort, remove the custom code and re-implement it carefully, ensuring all syntax is correct and matching the provided code exactly.

    Limitations and Considerations

    • The shortcode only functions on pages where subscription context is available via URL parameter or cookie;
    • Trial period detection relies on MemberPress subscription metadata being accurate and up to date;
    • This solution does not work for one-time memberships configured to expire after X days, as those are not subscription-based trials;
    • Page caching can cause trial content to display incorrectly if cache is not properly cleared when trial status changes;
    • The shortcode cannot be used to conditionally show content based on trial status for multiple subscriptions simultaneously;
    • Custom gateway implementations may handle trial periods differently, potentially affecting shortcode functionality;
    • This is custom code and is not officially supported by MemberPress. Any MemberPress core updates could potentially affect functionality.

    Public Facing Documentation / Additional References

    Public Facing Documentation

    Developer Documentation

  • How to Display Multiple MemberPress Registration Forms in Pop-ups

    Summary

    MemberPress does not include built-in pop-up functionality for displaying registration forms. To display multiple membership registration forms in pop-ups on a single page, an additional plugin must be used. The Popup Maker plugin provides this functionality and integrates seamlessly with MemberPress registration form shortcodes.

    This document provides step-by-step instructions for configuring Popup Maker to display MemberPress registration forms in pop-ups. This solution is particularly useful for creating pricing comparison pages where users can select from multiple membership options without navigating to separate registration pages. The document also addresses a critical JavaScript error that occurs when MemberPress custom fields (particularly phone fields) are used within pop-up forms and provides the PHP code snippet necessary to resolve this issue.

    Implementation

    Installing and Configuring Popup Maker for MemberPress Registration Forms

    The Popup Maker plugin must be installed and activated before creating pop-ups for MemberPress registration forms.

    1. Navigate to Dashboard > Plugins > Add New Plugin.
    2. Search for “Popup Maker” in the plugin search field.
    1. Locate “Popup Maker – Boost Sales, Conversions, Optins, Subscribers with the Ultimate WP Popups Builder” by Daniel Iser.
    2. Click Install Now.
    3. Click Activate after installation completes.

    Setting MemberPress Account Tab

    Navigate to Dashboard > MemberPress > Settings > Account.

    Click Enable Single Page Checkout and Enable Single Page Checkout Invoices

    Click the Update Options button.

    Obtaining MemberPress Registration Form Shortcodes

    Each membership requires its unique registration form shortcode to be used within the pop-up.

    1. Navigate to Dashboard > MemberPress > Memberships.
    2. Click on the membership you want to display in a pop-up to open the membership edit screen.
    3. Scroll down to the Membership Options meta box.
    4. Click the Membership Shortcodes link to reveal available shortcodes.
    5. Copy the  shortcode (where 123 is replaced with your actual membership ID).
    6. Repeat this process for each membership you want to display in a pop-up.

    Note: When using the registration form shortcode outside of the default membership registration page, you must enable Global CSS in Dashboard > MemberPress > Settings > General to prevent form styling errors.

    Creating Pop-ups for Each Membership Registration Form

    Each membership requires a separate pop-up to be created in Popup Maker.

    1. Navigate to Popup Maker > Add New Popup.
    2. Enter a descriptive title for the pop-up (e.g., “Basic Membership Registration” or “Premium Membership Registration”).
    3. In the content editor, add a Shortcode block from the block inserter.
    4. Paste the MemberPress registration form shortcode you copied earlier (e.g., ).
    5. Click the Add New Trigger button in the Popup Settings section.
    6. Ensure Click Open is selected as the trigger type.
    7. Click Add to save the trigger.
    8. Leave other popup settings at their default values unless specific customization is required.
    9. Click Publish to save the pop-up.
    10. Repeat this process for each membership registration form you want to display in a pop-up.

    Connecting Pop-ups to Buttons on Your Page

    After creating pop-ups for each membership, you must connect them to buttons or links on your pricing page.

    1. Navigate to Popup Maker > All Popups.
    2. Locate the CSS Class value for each pop-up you created (e.g., “popmake-474”).
    3. Copy the CSS Class value for the first pop-up.
    4. Navigate to the page or post where you want to display the membership options.
    5. Create a button using your page builder or the WordPress block editor.
    6. Configure the button with appropriate text (e.g., “Sign Up for Basic”).
    7. In the button link field, enter a hash symbol followed by the CSS Class value (e.g., #popmake-474).
    8. Style the button as desired to match your site design.
    9. Repeat this process for each membership, connecting each button to its corresponding pop-up CSS Class.
    10. Click Publish or Update to save the page.
    11. Test each button to verify the correct pop-up appears with the appropriate registration form.

    MemberPress Custom Field JavaScript Error in Pop-ups

    Registration Forms with Custom Fields Fail to Submit in Pop-ups

    When MemberPress registration forms include custom fields (particularly phone fields that use the international telephone input library), submitting the form inside a Popup Maker pop-up triggers a JavaScript error. The error message “Cannot read properties of undefined (reading ‘getInstance’)” appears in the browser console and prevents form submission.

    This error occurs because the MemberPress phone field validation script attempts to access the intlTelInputGlobals JavaScript object before verifying its existence. In pop-up contexts, the loading order of JavaScript libraries can differ from standard page loads, causing the phone field library to be unavailable when the form submission handler executes.

    How to Test/Fix:

    The solution requires adding a PHP code snippet that overrides the default MemberPress form submission handler with enhanced safety checks. This snippet can be added using the WPCode plugin or by adding it to a child theme’s functions.php file.

    Method 1: Using WPCode Plugin (Recommended)

    1. Install and activate the WPCode plugin from the WordPress plugin repository.
    2. Navigate to Dashboard > Code Snippets > Add Snippet.
    3. Click the Add Your Custom Code (New Snippet) option.
    4. Select PHP Snippet as the code type.
    5. Enter a descriptive title such as “Fix MemberPress Phone Field Error in Popups”.
    6. Paste the code snippet provided below into the Code Preview area.
    7. In the Insertion section, select Auto Insert.
    8. Set Location to Run Everywhere.
    9. Click Save Snippet and toggle the snippet to Active.
    10. Test the registration form in the pop-up to verify submission works correctly.

    Method 2: Adding Code to Child Theme functions.php File

    1. Connect to your site via FTP or use your hosting control panel file manager.
    2. Navigate to /wp-content/themes/your-child-theme/.
    3. Open the functions.php file for editing.
    4. Paste the code snippet provided below at the end of the file.
    5. Save the file and upload it back to your server if using FTP.
    6. Test the registration form in the pop-up to verify submission works correctly.

    Important: Always create a child theme before editing theme files directly. Modifying the parent theme’s functions.php file will cause your changes to be lost when the theme is updated.

    PHP Code Snippet:

    /**
     * Fix for MemberPress phone field error in popup forms
     * 
     * This fixes the "Cannot read properties of undefined (reading 'getInstance')" error
     * that occurs when submitting membership forms with phone fields in popups.
     * 
     * Add this to your child theme's functions.php or use WPCode plugin
     */
    
    function mepr_fix_phone_field_popup_error() {
        // Only load on pages where MemberPress signup forms might appear
        if (!class_exists('MeprAppCtrl')) {
            return;
        }
        
        // Enqueue fix script after mp-signup loads
        wp_add_inline_script('mp-signup', '
            (function($) {
                // Wait for DOM to be ready
                $(document).ready(function() {
                    // Override the submit handler to add safety checks for phone fields
                    $("body").off("click", ".mepr-signup-form .mepr-submit");
                    
                    $("body").on("click", ".mepr-signup-form .mepr-submit", function(e) {
                        // We want to control if/when the form is submitted
                        e.preventDefault();
                        
                        var form = $(this).closest(".mepr-signup-form");
                        var coupon = form.find(".mepr-coupon-code");
                        
                        if(coupon.data("validating")) {
                            coupon.data("submit-when-valid", true);
                            return;
                        }
                        
                        // Validate all visible inputs
                        $.each(form.find(".mepr-form-input:visible"), function(i, obj) {
                            if (typeof meprValidateInput === "function") {
                                meprValidateInput(obj, true);
                            }
                        });
                        
                        if (0 < form.find(".invalid:visible").length) {
                            form.find(".validation").addClass("failed");
                        } else {
                            // Fixed phone field handling with safety checks
                            var submittedTelInputs = document.querySelectorAll(".mepr-tel-input");
                            for (var i = 0; i < submittedTelInputs.length; i++) {
                                // Check if intlTelInputGlobals exists and getInstance is available
                                if (window.intlTelInputGlobals && typeof window.intlTelInputGlobals.getInstance === "function") {
                                    var iti = window.intlTelInputGlobals.getInstance(submittedTelInputs[i]);
                                    if (iti && typeof iti.getNumber === "function") {
                                        submittedTelInputs[i].value = iti.getNumber();
                                    }
                                }
                            }
                            
                            form.find(".validation").addClass("passed");
                            this.disabled = true;
                            form.find(".mepr-loading-gif").show();
                            $(this).trigger("mepr-register-submit");
                            form.submit();
                        }
                    });
                });
            })(jQuery);
        ', 'after');
    }
    add_action('wp_enqueue_scripts', 'mepr_fix_phone_field_popup_error', 999);

    Code Explanation:

    • The function checks if MemberPress is active before executing to prevent errors on non-MemberPress pages;
    • The script overrides the default MemberPress form submission handler with enhanced safety checks;
    • Before accessing phone field data, the code verifies that window.intlTelInputGlobals exists and the getInstance method is available;
    • If the phone field library is available, it retrieves the formatted phone number. If not, it continues with form submission without triggering an error;
    • The script is enqueued with priority 999 to ensure it loads after the default MemberPress signup script.

    Additional Considerations and Limitations

    • Pop-up registration forms do not display the MemberPress purchase summary sidebar that appears on default registration pages. All pricing information must be clearly communicated on the main page before users open the pop-up;
    • The Popup Maker free version provides all necessary functionality for this implementation. Premium features are not required unless advanced targeting or analytics are needed
    • Registration forms in pop-ups are fully responsive and function correctly on mobile devices when Popup Maker default settings are used;
    • If using page caching plugins, ensure pop-up functionality is excluded from caching or use cache-compatible pop-up loading methods;
    • Test all registration forms thoroughly in different browsers and devices to verify proper functionality before making the implementation live;
    • The PHP code snippet must remain active as long as registration forms with custom phone fields are used within pop-ups.

    Public Facing Documentation / Additional References

    Public Facing Documentation

    Developer Documentation

  • How to Reset Core MemberPress Data With a Custom Code Snippet

    Summary

    This article provides a custom code snippet that allows advanced users to safely reset core MemberPress data through the WordPress admin interface. This method offers a more user-friendly and secure alternative to manually running SQL queries directly on the database.

    The solution is ideal for scenarios such as site migrations, cleaning up test environments, or preparing a site for fresh data imports. The snippet automates the database reset process while adding important security features, including administrator capability checks, nonce verification to prevent accidental triggers, a confirmation prompt before any data is deleted, and clear feedback on what was deleted.

    CRITICAL WARNINGS:
    This action is IRREVERSIBLE. Once data is deleted, it cannot be recovered;
    You MUST create a full database backup before using this snippet. If something goes wrong, a backup is your only way to restore your data;
    Test on a staging site first if available.

    Troubleshooting

    Why Use This Method Instead of Manual SQL Queries

    MemberPress does not have a built-in reset button for bulk deleting membership data. The official method requires running SQL queries manually through tools like phpMyAdmin. This custom snippet automates those queries while adding important security features.

    The snippet includes user capability checks to ensure only administrators can trigger the reset, nonce verification to prevent accidental triggers, a confirmation prompt before any data is deleted, and clear feedback on what was deleted.

    What This Snippet Deletes

    When triggered, this snippet will permanently delete the following MemberPress data:

    • All Subscriptions (active, expired, pending, etc.);
    • All Transactions (completed, pending, failed, refunded, etc.);
    • All MemberPress Members (membership records only – see note below);
    • All MemberPress Products/Memberships;
    • All MemberPress Groups;
    • All MemberPress Coupons;
    • All MemberPress Rules;
    • All MemberPress Reminders;
    • All MemberPress Settings (including payment gateway configurations and plugin options).

    Important: This snippet does NOT delete WordPress user accounts. Users will still exist in your WordPress installation (Dashboard > Users > All Users), but they will no longer have any MemberPress memberships or membership status associated with them.

    If you also need to remove WordPress user accounts (for example, to avoid conflicts during a migration), use a plugin like WP Bulk Delete.

    What This Snippet Does NOT Delete

    This snippet only handles core MemberPress data. It does NOT delete data from MemberPress add-ons such as:

    • Corporate Accounts;
    • Courses;
    • CoachKit;
    • Downloads;
    • ClubSuite;
    • PDF Invoices.

    If you need to clear add-on data as well, refer to the official documentation for the additional SQL queries required.

    Installing the Snippet

    1) Using WPCode Plugin (Recommended)

    WPCode provides a safer and more organized way to add custom code snippets compared to editing theme files directly. The plugin includes error handling and prevents code changes from being lost during theme updates.

    Steps:

    1. Install and activate the WPCode plugin if not already installed.
    2. Navigate to Dashboard > Code Snippets > Add Snippet in the WordPress admin.
    3. Copy the complete code from this Gist: https://gist.github.com/oilerart/68196b428ac23c20fa68876170841873.
    4. Paste the code into a new snippet in WPCode.
    5. Set the snippet to run “Everywhere” or “Admin Only”.
    6. Click Save Snippet and then click Activate.

    For detailed instructions on using WPCode, see How to Add Custom Code Snippets in WPCode.

    2) Adding to Child Theme functions.php

    Alternatively, you can add the code to your child theme’s functions.php file. Always use a child theme to prevent changes from being overwritten during theme updates.

    Steps:

    1. Access the site files via FTP or cPanel File Manager.
    2. Navigate to /wp-content/themes/your-child-theme/.
    3. Open the functions.php file for editing.
    4. Copy the complete code from the Gist linked above.
    5. Paste the code at the end of the functions.php file.
    6. Save the file and upload it back to the server if editing locally.

    Using the Snippet to Reset Data

    Once the snippet is activated, follow these steps to reset the MemberPress data:

    1. Back up the entire database. This cannot be stressed enough.
    2. Log into the WordPress admin as an administrator (user must have manage_options capability).
    3. In the browser’s address bar, navigate to: https://yoursite.com/wp-admin/?deletempdata=true. Replace yoursite.com with the actual domain.
    4. A warning prompt will appear in the WordPress admin area with a detailed list of what will be deleted.
    5. Click the Confirm Reset button.
    6. A JavaScript confirmation dialog will appear. Click OK to proceed.
    7. The snippet will execute the deletion queries and display a completion message showing what was deleted.

    Customizing What Gets Deleted

    If you want to preserve certain types of data (for example, keeping MemberPress settings or products intact), you can customize the snippet by commenting out specific lines of code.

    1) Preserve MemberPress Settings

    MemberPress settings include payment gateway configurations, plugin options, and other global settings. To keep these intact, comment out the relevant code lines.

    Steps:

    1. Open the snippet in WPCode or the functions.php file.
    2. Locate the mepr_perform_data_reset() function.
    3. Find these lines (approximately lines 95-97):
    $deleted_options = $wpdb->query( "DELETE FROM {$prefix}options WHERE option_name LIKE '%mepr%'" );
    echo '<p>Deleted ' . intval( $deleted_options ) . ' options matching %mepr%.</p>';
    1. Comment them out by adding // at the beginning of each line:
    // $deleted_options = $wpdb->query( "DELETE FROM {$prefix}options WHERE option_name LIKE '%mepr%'" );
    // echo '<p>Deleted ' . intval( $deleted_options ) . ' options matching %mepr%.</p>';
    1. Optionally, add a feedback line:
    echo '<p>MemberPress settings were preserved.</p>';
    1. Save the snippet.

    2) Preserve MemberPress Products, Groups, Coupons, Rules, and Reminders

    These items are stored as WordPress custom post types. To keep them intact, comment out the relevant code lines.

    Steps:

    1. In the mepr_perform_data_reset() function, find these lines (approximately lines 77-88):
    $post_types         = array( 'memberpresscoupon', 'memberpressgroup', 'memberpressproduct', 'mp-reminder', 'memberpressrule' );
    $post_types_escaped = "'" . implode( "', '", array_map( 'esc_sql', $post_types ) ) . "'";
    $wpdb->query( "DELETE FROM {$prefix}postmeta WHERE post_id IN (SELECT ID FROM {$prefix}posts WHERE post_type IN ({$post_types_escaped}))" );
    echo '<p>Deleted related postmeta for MemberPress post types.</p>';
    $deleted_posts = $wpdb->query( "DELETE FROM {$prefix}posts WHERE post_type IN ({$post_types_escaped})" );
    echo '<p>Deleted ' . intval( $deleted_posts ) . ' posts (MemberPress products, groups, coupons, reminders, rules).</p>';
    1. Comment out all these lines:
    // $post_types         = array( 'memberpresscoupon', 'memberpressgroup', 'memberpressproduct', 'mp-reminder', 'memberpressrule' );
    // $post_types_escaped = "'" . implode( "', '", array_map( 'esc_sql', $post_types ) ) . "'";
    // $wpdb->query( "DELETE FROM {$prefix}postmeta WHERE post_id IN (SELECT ID FROM {$prefix}posts WHERE post_type IN ({$post_types_escaped}))" );
    // echo '<p>Deleted related postmeta for MemberPress post types.</p>';
    // $deleted_posts = $wpdb->query( "DELETE FROM {$prefix}posts WHERE post_type IN ({$post_types_escaped})" );
    // echo '<p>Deleted ' . intval( $deleted_posts ) . ' posts (MemberPress products, groups, coupons, reminders, rules).</p>';
    1. Optionally, add feedback:
    echo '<p>MemberPress content types (products, groups, coupons, reminders, rules) were preserved.</p>';
    1. Save the snippet.

    Important: If you customize the snippet, make sure to update the warning messages in the mepr_show_reset_confirmation() function to accurately reflect what will and will not be deleted. This prevents confusion and accidental data loss.

    Common Issues and Solutions

    1) Nothing Happens When Visiting the URL

    Several factors can prevent the snippet from triggering when visiting the URL with the query parameter.

    Solutions:

    • Check if the snippet is active: Go to Dashboard > Code Snippets in WPCode and ensure the snippet is enabled;
    • Verify logged in as an admin: The snippet requires the manage_options capability;
    • Clear browser cache and try again;
    • Check for plugin conflicts: Temporarily deactivate security plugins or caching plugins that might interfere with URL parameters.

    2) “Security Check Failed” Error

    This means the nonce verification failed. This can happen if the URL was manually typed with a nonce parameter instead of using the confirmation button, the nonce expired (nonces are time-limited), or the session changed.

    Solution:

    Start fresh by visiting https://yoursite.com/wp-admin/?deletempdata=true without any additional parameters. Let the snippet generate the nonce automatically via the confirmation prompt.

    3) “You Do Not Have Permission” Error

    This snippet requires administrator-level access. Ensure logged in as a user with the manage_options capability (typically an Administrator role).

    Solution:

    Verify the user role under Dashboard > Users > All Users. If not an Administrator, either log in with an Administrator account or have an Administrator run the snippet.

    When NOT to Use This Snippet

    This snippet is designed for comprehensive data resets. If you only need to delete a few specific items (for example, a handful of test subscriptions), it is more efficient to delete them manually through the MemberPress admin interface rather than wiping everything.

    Navigate to Dashboard > MemberPress > Subscriptions (or TransactionsMemberships, etc.) and use the individual delete options for targeted removals.

    Public Facing Documentation / Additional References

    Public Facing Documentation

    Developer Documentation

    Additional References

  • HTTP Authentication Causing Thank You Page 404 Errors in MemberPress

    Summary

    HTTP authentication (also known as basic authentication or .htpasswd authentication) is commonly used by hosting providers and developers to restrict access to staging and development sites. When enabled on sites running MemberPress, this security measure can interfere with the checkout process and cause the Thank You page to display a 404 error after users complete their registration.

    This issue occurs because HTTP authentication disrupts the transaction parameter that MemberPress uses to redirect users from the registration page through checkout to the Thank You page. Instead of receiving a valid numeric transaction identifier, the system receives a single character, preventing proper page routing and confirmation display.

    This document provides troubleshooting guidance for identifying HTTP authentication conflicts with MemberPress checkout flows and explains how to resolve Thank You page 404 errors caused by this security configuration.

    Troubleshooting

    Thank You Page Returns 404 Error After Checkout

    1) HTTP Authentication Interfering With Transaction Parameter

    When HTTP authentication is enabled on the site, it interrupts the checkout redirect process between the registration page and Thank You page. The transaction parameter in the URL receives an incorrect single-character value instead of the expected numeric transaction identifier.

    This occurs because HTTP authentication adds an additional authentication layer that interferes with how MemberPress generates and passes transaction data through the checkout workflow. The authentication prompt causes the transaction identifier to be truncated or corrupted during the redirect process.

    How to Test/Fix:

    1. Open your browser’s Developer Tools by pressing F12 or right-clicking on the page and selecting Inspect.
    2. Navigate to the Network tab in Developer Tools.
    3. Keep the Network tab open and complete a test registration on your site.
    4. After clicking the checkout button, watch for the redirect URL in the Network tab.
    5. Look for the URL that includes /?action=checkout&txn= followed by a value.
    6. Check the value after txn= in the URL. Examples:
      • Incorrect: yourdomain.com/register/free-account/?action=checkout&txn=b (single character);
      • Correct: yourdomain.com/register/free-account/?action=checkout&txn=12345 (numeric value);
    7. If the transaction parameter shows a single letter instead of a number, HTTP authentication is interfering with the checkout process.
    8. Contact your hosting provider or site administrator to disable HTTP authentication.
    9. After removing HTTP authentication, clear your browser cache and test the checkout process again.
    10. Verify the Thank You page loads correctly after completing a test transaction.

    2) HTTP Authentication Configuration File Blocking MemberPress Redirects

    HTTP authentication typically uses .htaccess and .htpasswd files to restrict site access. These files can block the automated redirects that MemberPress uses to move users through the checkout workflow.

    How to Test/Fix:

    1. Access your site files via FTPSFTP, or your hosting provider’s File Manager.
    2. Navigate to your site’s root directory (usually public_html or www).
    3. Look for files named .htaccess and .htpasswd.
    4. Download backup copies of both files before making any changes.
    5. Open the .htaccess file and locate HTTP authentication directives:
      • AuthType Basic;
      • AuthName;
      • AuthUserFile;
      • Require valid-user;
    6. Comment out these lines by adding # at the beginning of each line, or remove them entirely.
    7. Save the modified .htaccess file.
    8. Test the checkout process to confirm the Thank You page loads correctly.
    9. If you need to keep HTTP authentication active, contact your hosting provider about implementing authentication that excludes MemberPress checkout pages.

    Important: Always create backup copies of .htaccess and .htpasswd files before modifying them. Incorrect configuration can make your entire site inaccessible.

    3) Server-Level HTTP Authentication Configured by Hosting Provider

    Some hosting providers implement HTTP authentication at the server level rather than through .htaccess files. This configuration cannot be modified directly through file management and requires hosting provider intervention.

    How to Test/Fix:

    1. Check your site’s root directory for .htaccess and .htpasswd files.
    2. If these files do not exist but you still receive authentication prompts when accessing the site, authentication is configured at the server level.
    3. Log in to your hosting provider’s control panel (cPanel, Plesk, or custom dashboard).
    4. Look for security settings such as Password Protect Directories or Directory Privacy.
    5. If you find HTTP authentication enabled for your site directory, disable it.
    6. If you cannot locate authentication settings in your control panel, contact your hosting provider’s support team.
    7. Request that they remove HTTP authentication from your domain or configure it to exclude MemberPress checkout URLs.
    8. Provide your hosting support team with the following information:
      • The issue occurs during checkout redirects;
      • The txn parameter in checkout URLs receives incorrect values;
      • MemberPress requires uninterrupted redirects between registration and Thank You pages;
    9. After hosting provider makes changes, test the checkout process to verify the Thank You page loads correctly.

    Alternative Solutions for Staging Site Security

    If you need to restrict access to your staging or development site while keeping MemberPress checkout functionality working, consider these alternative security measures:

    • IP Whitelisting: Configure your hosting provider to allow access only from specific IP addresses;
    • Subdomain Configuration: Use a non-public subdomain name that is difficult to guess (e.g., dev-[[RANDOM-STRING]].yourdomain.com);
    • WordPress Maintenance Mode Plugins: Use plugins that allow admin access while restricting public access without interfering with checkout processes;
    • Coming Soon Page Plugins: Install plugins that display coming soon pages to visitors while allowing logged-in administrators full access;
    • Robots.txt Configuration: Prevent search engines from indexing your staging site by configuring robots.txt to disallow all crawlers.

    Public Facing Documentation / Additional References

    Public Facing Documentation

    Additional References

  • Unable to Toggle MemberPress Course Emails Off

    Summary

    MemberPress Courses includes automated email notifications that can be managed from the Dashboard > MP Courses > Emails tab. In rare cases, users may encounter an issue where email toggles cannot be turned off. When this occurs, the toggle switch automatically reverts to the “on” position each time the page is saved or refreshed.

    This issue is typically caused by a missing database table that stores the email configuration settings. The wp_mpcs_emails table may not have been created during plugin installation due to database permission issues, interrupted installation processes, or server configuration problems. This document provides step-by-step instructions for diagnosing and resolving this database-related issue.

    Troubleshooting

    Course Email Toggles Reverting to “On” Position

    When the Course email toggles on the Dashboard > MP Courses > Emails page cannot be disabled, and they automatically revert to the enabled state after saving or refreshing, this indicates that the email settings cannot be properly stored in the WordPress database.

    Missing Database Table for Course Email Settings

    The wp_mpcs_emails database table stores all configuration data for MemberPress Course email notifications. If this table was not created during plugin installation, the system cannot save email toggle states and will revert to default settings (enabled) on each page load.

    How to Test/Fix:

    Step 1: Rule Out Plugin and Theme Conflicts

    1. Before checking the database, verify that the issue is not caused by plugin or theme conflicts.
    2. Navigate to Dashboard > Plugins.
    3. Deactivate all plugins except MemberPress and MemberPress Courses.
    4. Navigate to Dashboard > Appearance > Themes.
    5. Activate a default WordPress theme such as Twenty Twenty-Four.
    6. Test the email toggles at Dashboard > MP Courses > Emails.
    7. If the toggles work correctly, reactivate plugins and theme one at a time to identify the conflict.
    8. If the issue persists, proceed to Step 2.

    Step 2: Verify Database Table Exists

    1. Access the WordPress database using phpMyAdminAdminer, or your hosting provider’s database management tool.
    2. Locate the database associated with your WordPress installation.
    3. Search for the table named wp_mpcs_emails in the table list.
    4. If the table is present, the issue may be related to table structure or permissions rather than a missing table.
    5. If the table is not present, proceed to Step 3 to create it.

    Important: Your WordPress database may use a different table prefix than the default wp_ prefix. Check your wp-config.php file for the $table_prefix value and replace wp_ in all table names accordingly. For example, if your prefix is wpmp_, the table name would be wpmp_mpcs_emails.

    Step 3: Create the Missing Database Table

    Critical: Always create a complete backup of your WordPress database before executing any SQL queries. Database modifications cannot be reversed without a backup. Most hosting providers offer automated backup tools, or use plugins like UpdraftPlus or BackupBuddy to create a manual backup.

    1. Access your database management tool (phpMyAdmin, Adminer, etc.).
    2. Select your WordPress database from the database list.
    3. Click the SQL tab or Query option to open the SQL query interface.
    4. Copy the following SQL query into the query field:
    CREATE TABLE wp_mpcs_emails (
    'id` bigint(20) unsigned NOT NULL auto_increment,
    'email_key' varchar(255),
    'subject' varchar(500),
    'body' mediumtext,
    'enabled' tinyint(1) unsigned,
    'use_template' tinyint(1) unsigned,
    'created_at' datetime,
    PRIMARY KEY (id),
    KEY 'email_key' ('email_key')
    ) DEFAULT CHARACTER SET utf8mb4 COLLATE utf8mb4_unicode_ci;
    1. Replace wp_ with your actual table prefix if different from the default.
    2. Click GoExecute, or Run Query to execute the SQL statement.
    3. Verify that the query executed successfully by checking for a success message.
    4. Refresh the table list and confirm that wp_mpcs_emails now appears.
    5. Navigate to Dashboard > MP Courses > Emails in WordPress.
    6. Test the email toggles to verify they can now be disabled and the settings persist after saving.

    Step 4: Verify Email Settings Are Saved

    1. Toggle one or more Course email notifications to the “off” position.
    2. Click Save Changes or refresh the page.
    3. Verify that the toggles remain in the “off” position.
    4. Check the wp_mpcs_emails table in the database to confirm that rows have been created with enabled values set to 0 for disabled emails.

    Database Permissions Preventing Table Creation

    If the SQL query fails to execute or returns a permissions error, the database user assigned to WordPress may lack sufficient privileges to create tables.

    How to Test/Fix:

    1. Contact your hosting provider’s support team.
    2. Request that they verify the WordPress database user has CREATE and ALTER privileges.
    3. If using a managed WordPress host, ask them to execute the table creation query on your behalf.
    4. For VPS or dedicated server environments, check database user permissions in the hosting control panel or via SSH.
    5. Once permissions are corrected, retry the SQL query from Step 3 above.

    Interrupted Plugin Installation

    Server timeouts, PHP memory limits, or interrupted plugin activation processes during initial MemberPress Courses installation may prevent database tables from being created.

    How to Test/Fix:

    1. Navigate to Dashboard > Plugins.
    2. Deactivate MemberPress Courses.
    3. Delete the MemberPress Courses plugin completely.
    4. Reinstall MemberPress Courses from Dashboard > MemberPress > Add-Ons or by uploading a fresh copy.
    5. Activate the plugin and monitor for any error messages during activation.
    6. Check the wp_mpcs_emails table in the database to verify it was created.
    7. If the table is still missing, manually create it using the SQL query from Step 3 above.

    Additional Considerations

    • Server Configuration: Some hosting environments have strict database creation limits. Verify with your host that database table creation is permitted;
    • WordPress Multisite: For multisite installations, ensure you are accessing the correct database and that the table prefix corresponds to the specific site;
    • Database Collation: The SQL query uses utf8mb4_unicode_ci collation for proper character encoding. This is the WordPress standard and should be compatible with all modern WordPress installations;
    • Alternative Database Prefixes: Always verify your actual table prefix in wp-config.php before executing database queries to avoid creating tables with incorrect names.

    Public Facing Documentation / Additional References

    Public Facing Documentation

    Developer Documentation